Skin Shading in Karma using MaterialX
I recently got a question about skin shading with Karma. How does it work in XPU? How do you get the displacement and subsurface scattering dialed in correctly?
In this article, I aim to try and help you achieve great results for shading skin with Karma. Naturally, there are multiple ways to approach this, but I hope to provide a good base you can use for your own characters.
This will be a little more basic than previous articles, but I hope you'll learn something useful anyway!
Karma XPU is fast at rendering subsurface scattering and I think it delivers great results with minimal effort. It just requires you to be aware of a few "gotchas".
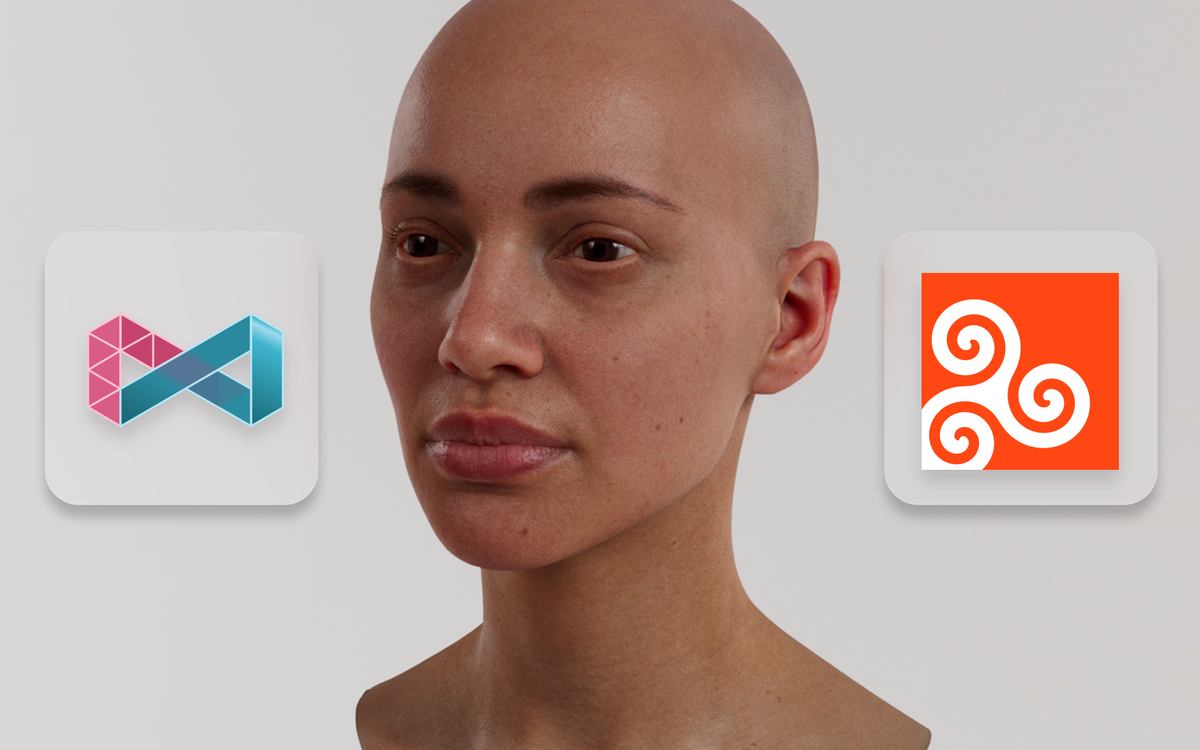
For this tutorial, I'll be using the excellent Free 3D Head Model from the 3D Scan Store. It's a really solid model and texture package. If you want to follow along feel free to jump in and download it.
The first two sections will be a general introduction to the features we'll use in our skin shader, followed by a more hands-on skin shading tutorial.
Let's dive in!
Final Turntable featuring Skin Shader.
Subsurface Scattering in Karma
Introduction to subsurface scattering (SSS) in Karma.
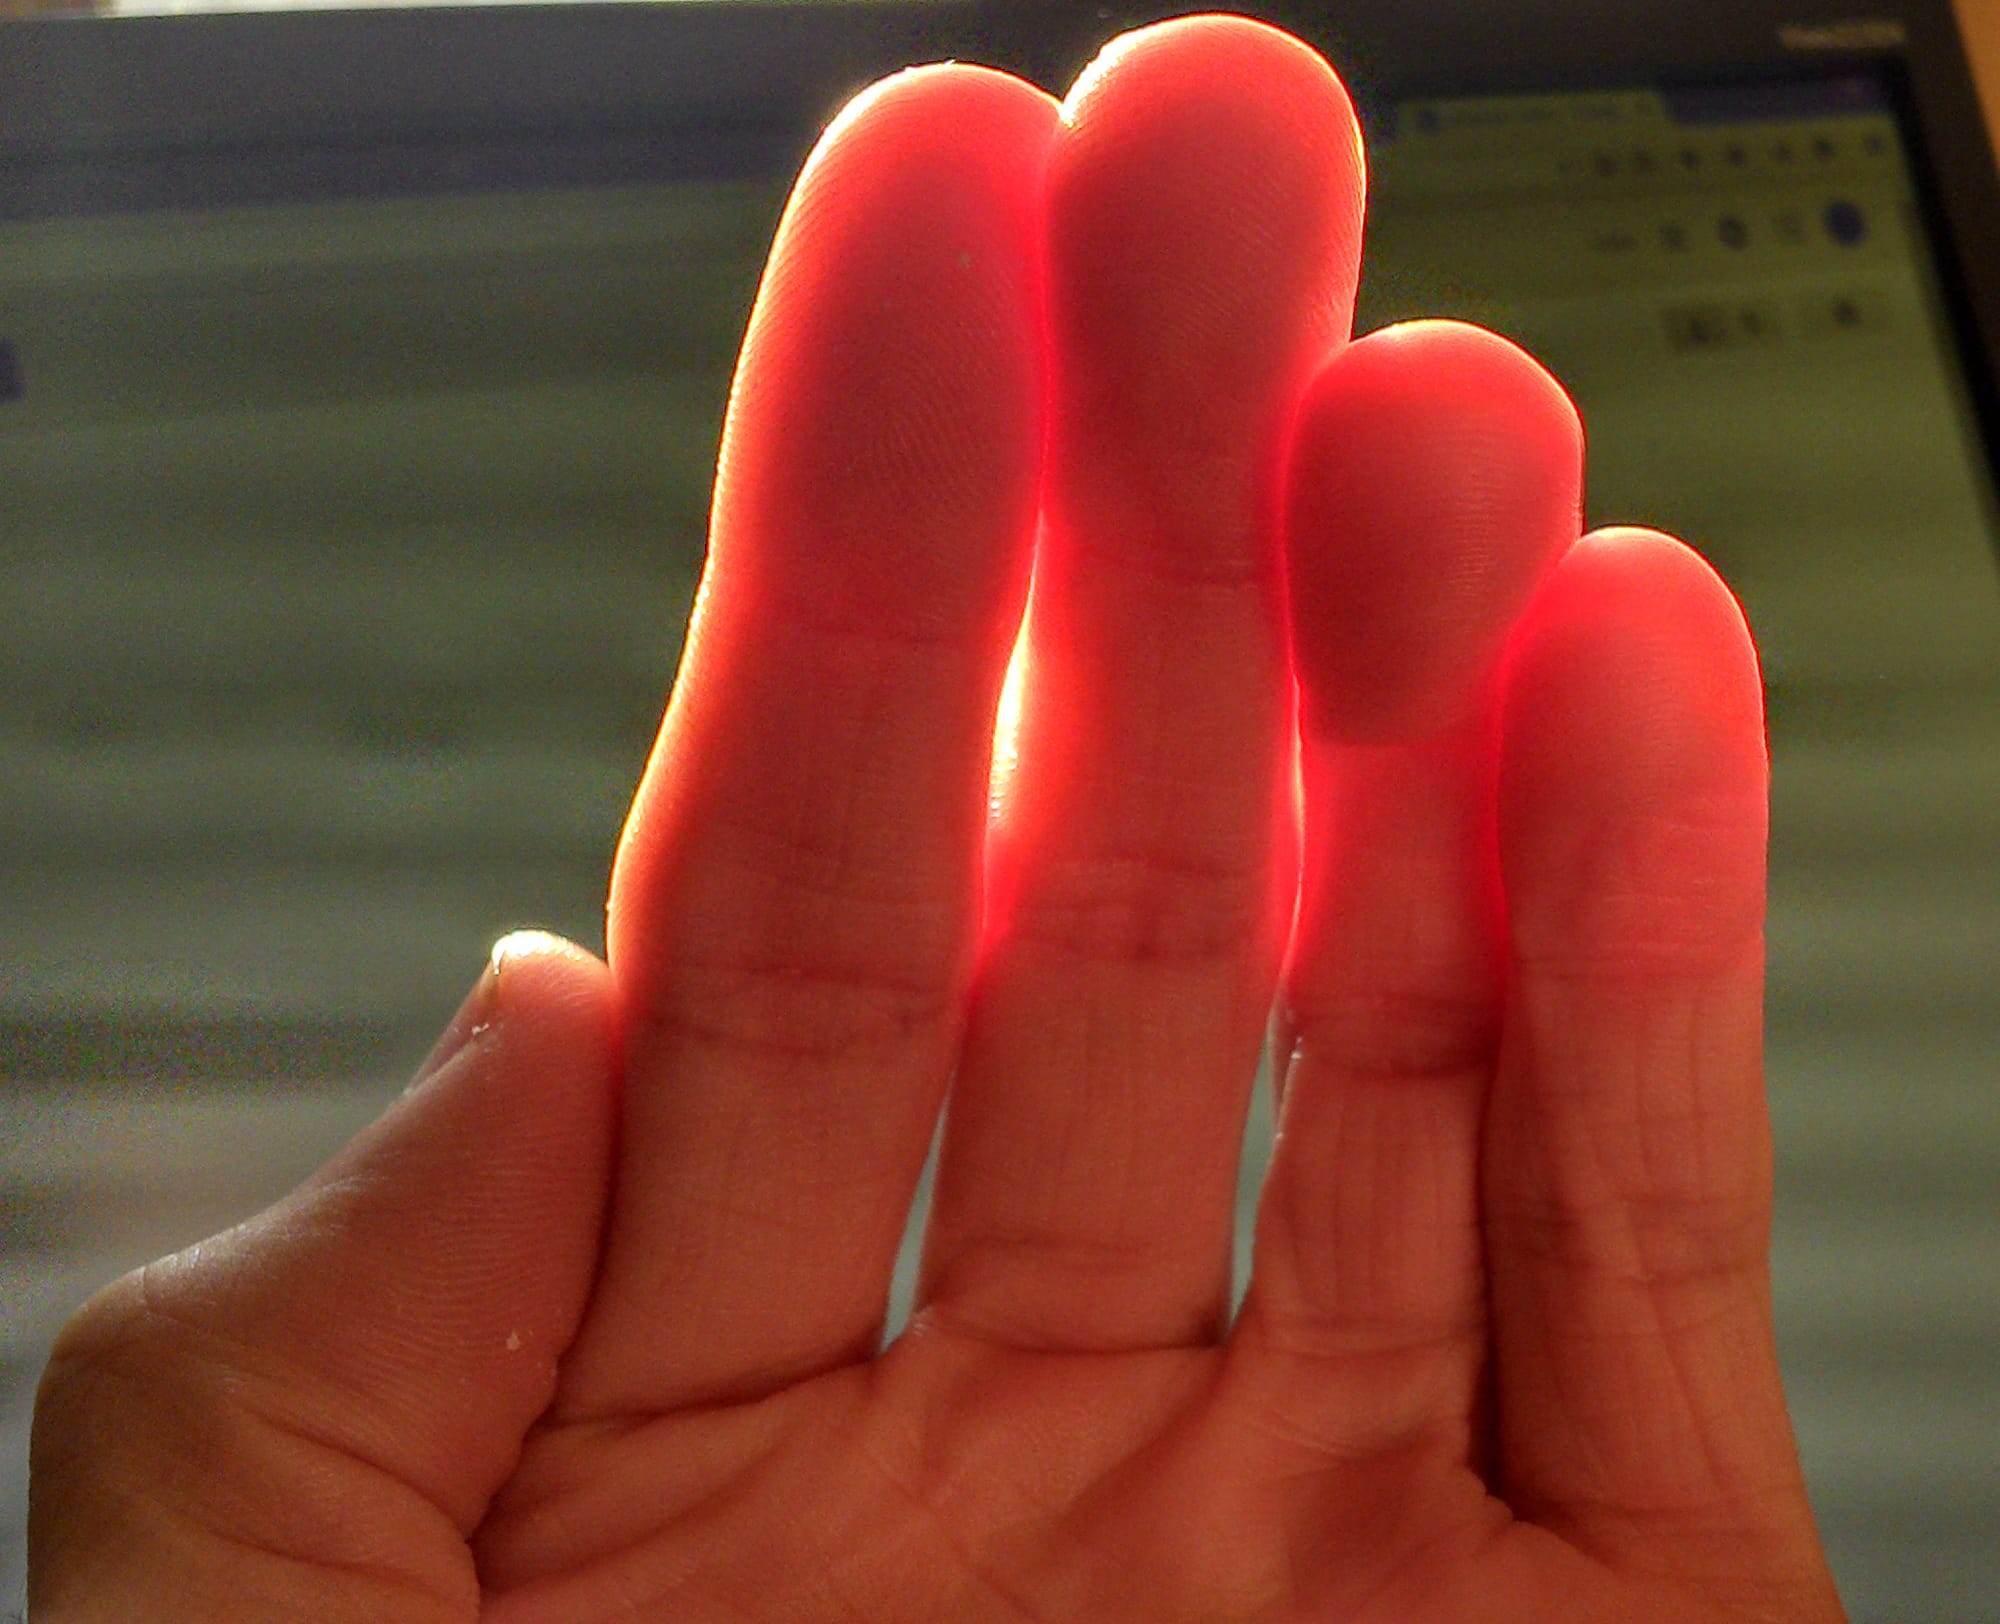
Subsurface scattering is a phenomenon where light rays enter an object and scatter. This effect is essential for proper skin shading as it simulates the translucency of skin.
For this tutorial we'll be using Karma XPU, therefore we have to use the new MaterialX shaders. Generally, I recommend using MaterialX even if you're working with Karma CPU as SideFX has expressed that this is the future of shading in Houdini.
Please also be aware that the entirety of this article takes place within Solaris (a.k.a. a /stage context).
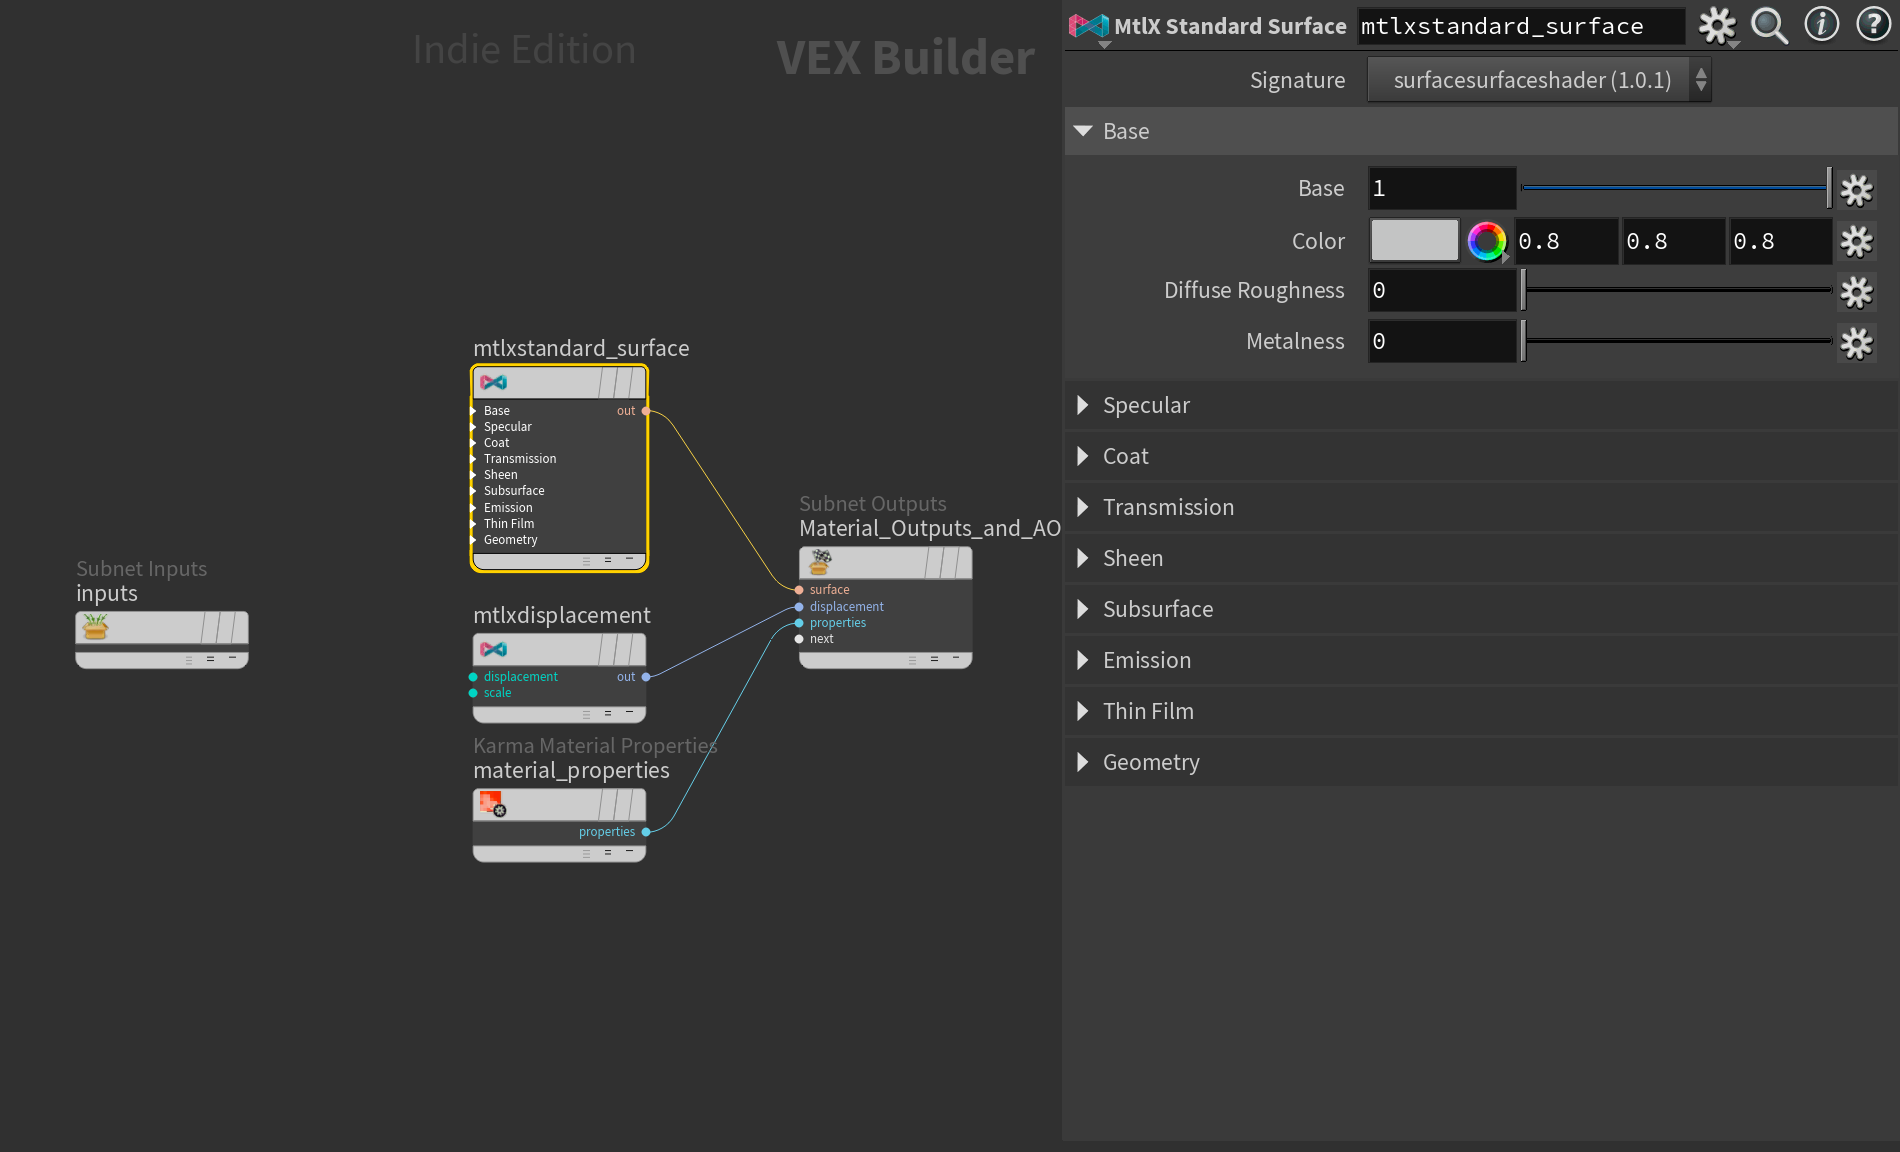
To build a MaterialX shader you create a MaterialX Material Builder in your Material Library LOP.
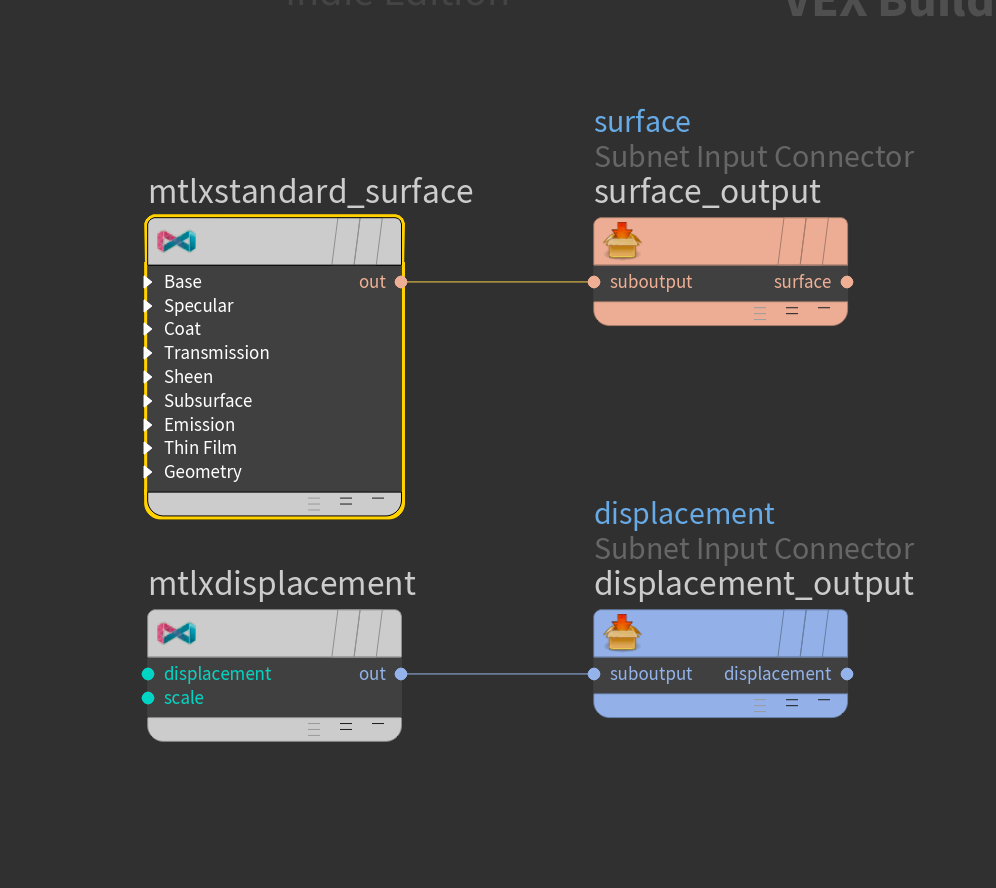
Inside this newly created subnetwork, you'll find a MtlX Standard Surface - this is the equivalent to a principled shader in Mantra and contains most of the shader options you'll need for PBR materials.
Before we dive into building the actual skin shader I wanted to cover the most important parameters in the Subsurface Scattering section of the MtlX Standard Surface shader:
Subsurface
The first setting you need to touch is called Subsurface. This represents how much SSS you want to add to your shader. If you set it to 1 it will completely replace whatever diffuse settings you have in the "Base" section of your shader. For most translucent materials you'll want to set this to 1, but it can be useful to lower it a bit for artistic purposes, so you can blend it with the diffuse.
Color
Color is pretty much what it sounds like - it's the color of your SSS. Later in our skin shader, we'll be using a slightly adjusted albedo/diffuse map.

Radius
Radius is likely the attribute you'll be playing with the most for SSS. It represents how far a light ray can travel into the mesh before it gets scattered. Higher values add more of the translucency effect, lower values create less. You can even control the radius of each color component (red, green, blue) which will be very useful when we start shading skin.
Scale
The scale parameter acts as a multiplier for the radius parameter. This is useful for working with different scene scales as the radius parameter is heavily dependent on your scene scale. For example, if you were shading a character that was originally in centimeters and it suddenly changed to meters you would have to set the scale to 0.01 to get the same translucency effect as before. (Since 1m = 100cm).
Anisotropy
Anisotropy represents the direction of your subsurface scattering. 0 is uniform scattering (default), positive values create forward scattering, and negative values create backward scattering. Check out the gif below for an example.
Displacement in Karma
Introduction to Displacement and Subdivision in Karma.
In this chapter, I want to cover two topics that can seem a little confusing for new users in Karma. Subdivision and Displacement.
In Karma subdivision has two requirements:
- The Mesh primitive must have a Subdivision Scheme set
- You have to set the dicing to an appropriate value
Let's go into a little more detail.
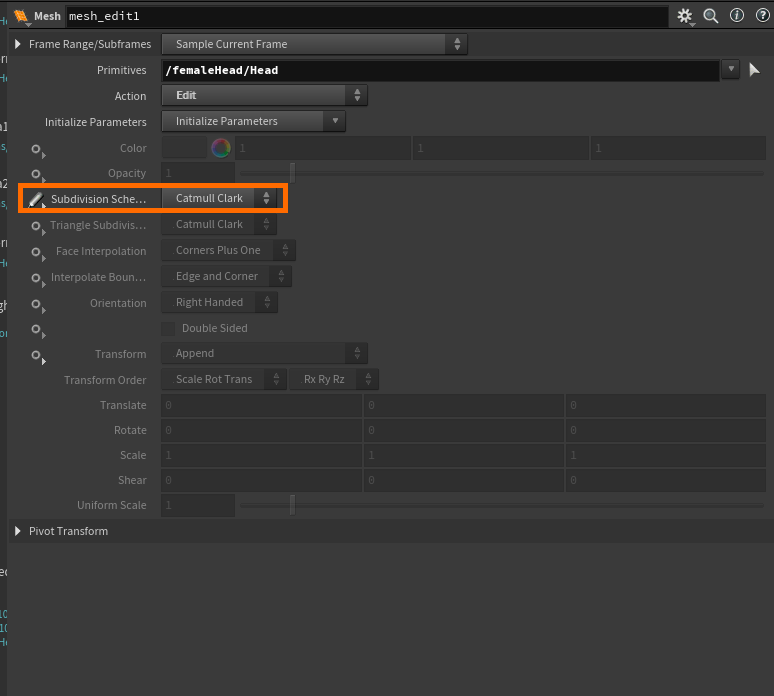
Subdivision Scheme
To mark your mesh primitive as an object capable of subdivision you have to target it with a Mesh Edit LOP and override the Subdivision Scheme.
This is not a feature specific to Karma or Solaris, but something that's a part of USD (specifically the USDGeomMesh class/schema if you want to get a little nerdy - this is a schema used by any traditional mesh primitive in your stage).
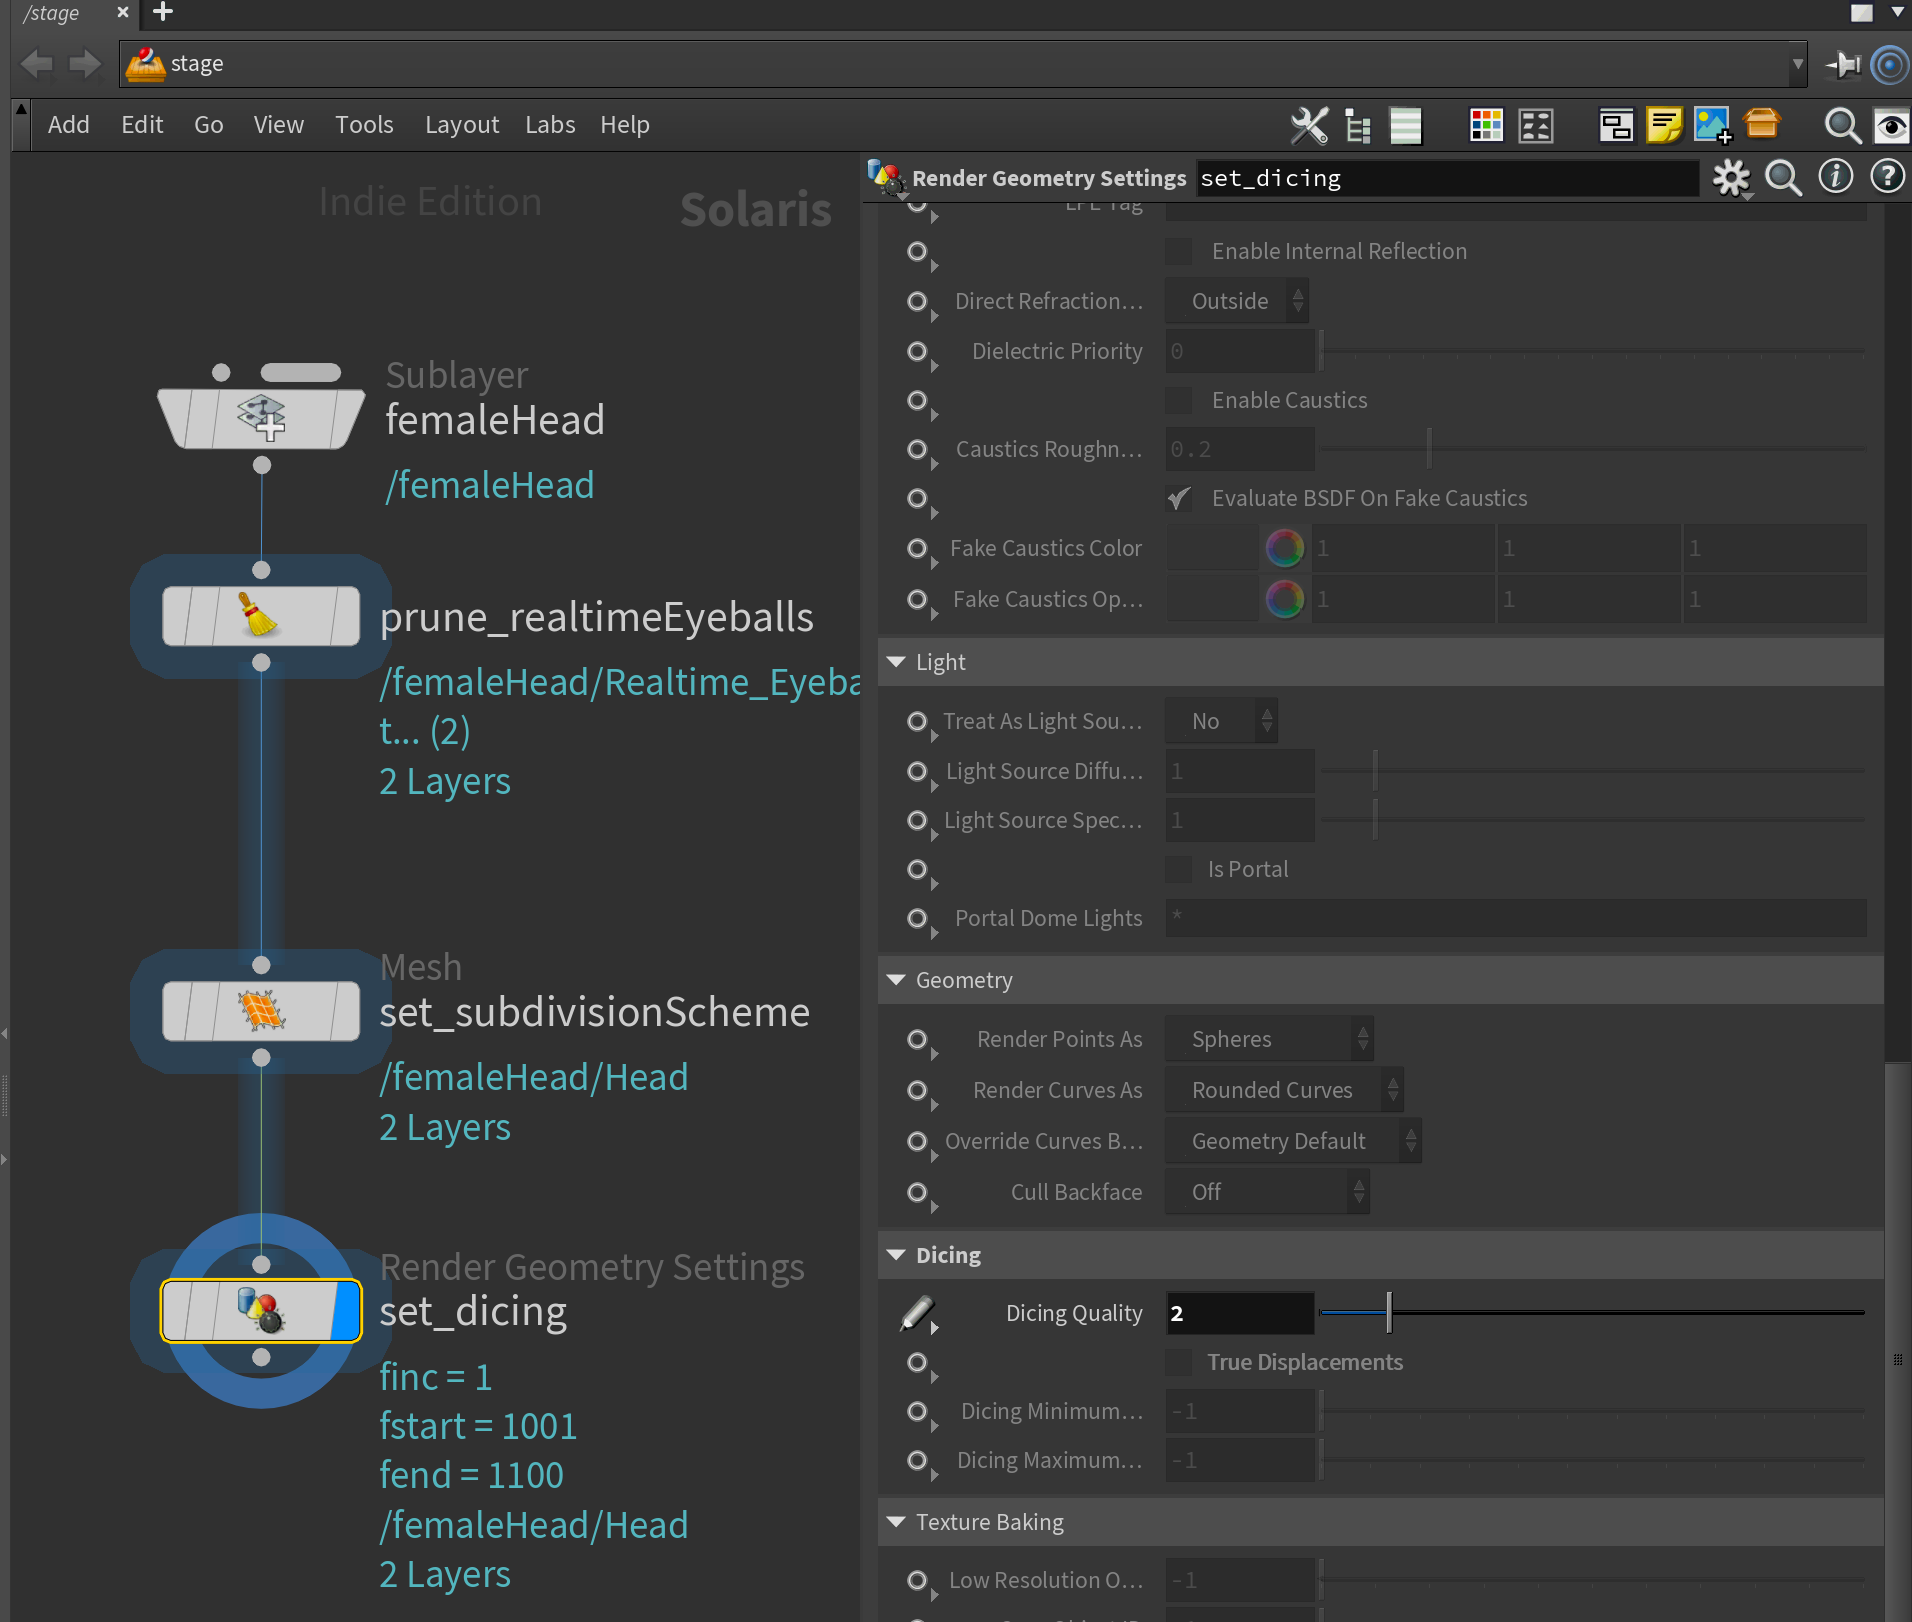
Dicing
Dicing is the way you control how much your mesh should get subdivided. The primary way to adjust this is targeting the primitive you want to subdivide using a Render Geometry Settings LOP. This node has many useful features but the one we're after is the Dicing section.
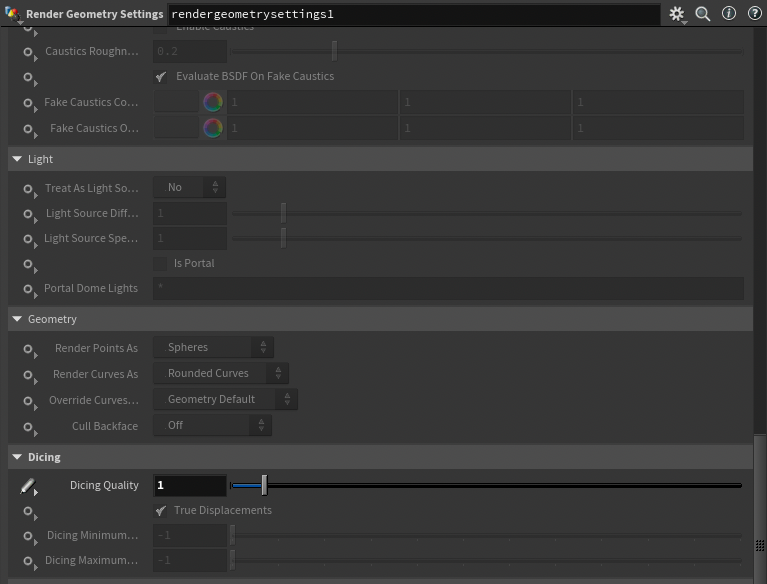
This main setting, Dicing Quality, corresponds to how many "micro polygons" are created per pixel in your render. The lower the value, the less subdivision. The higher the value, the more subdivision. I think it's a very elegant way of controlling subdivision compared to many other render engines.
Because this is based on pixels it's essentially creating a view-dependent subdivision similar to what you might find in other rendering engines like V-Ray.
You also have the option to control the Minimum and Maximum dicing if you wish.
Creating a Skin Shader
Putting it all together.
Now let's dive into creating the actual skin shader.
As mentioned earlier I'm using the free Female Head model from the 3D Scan Store which you can download here.
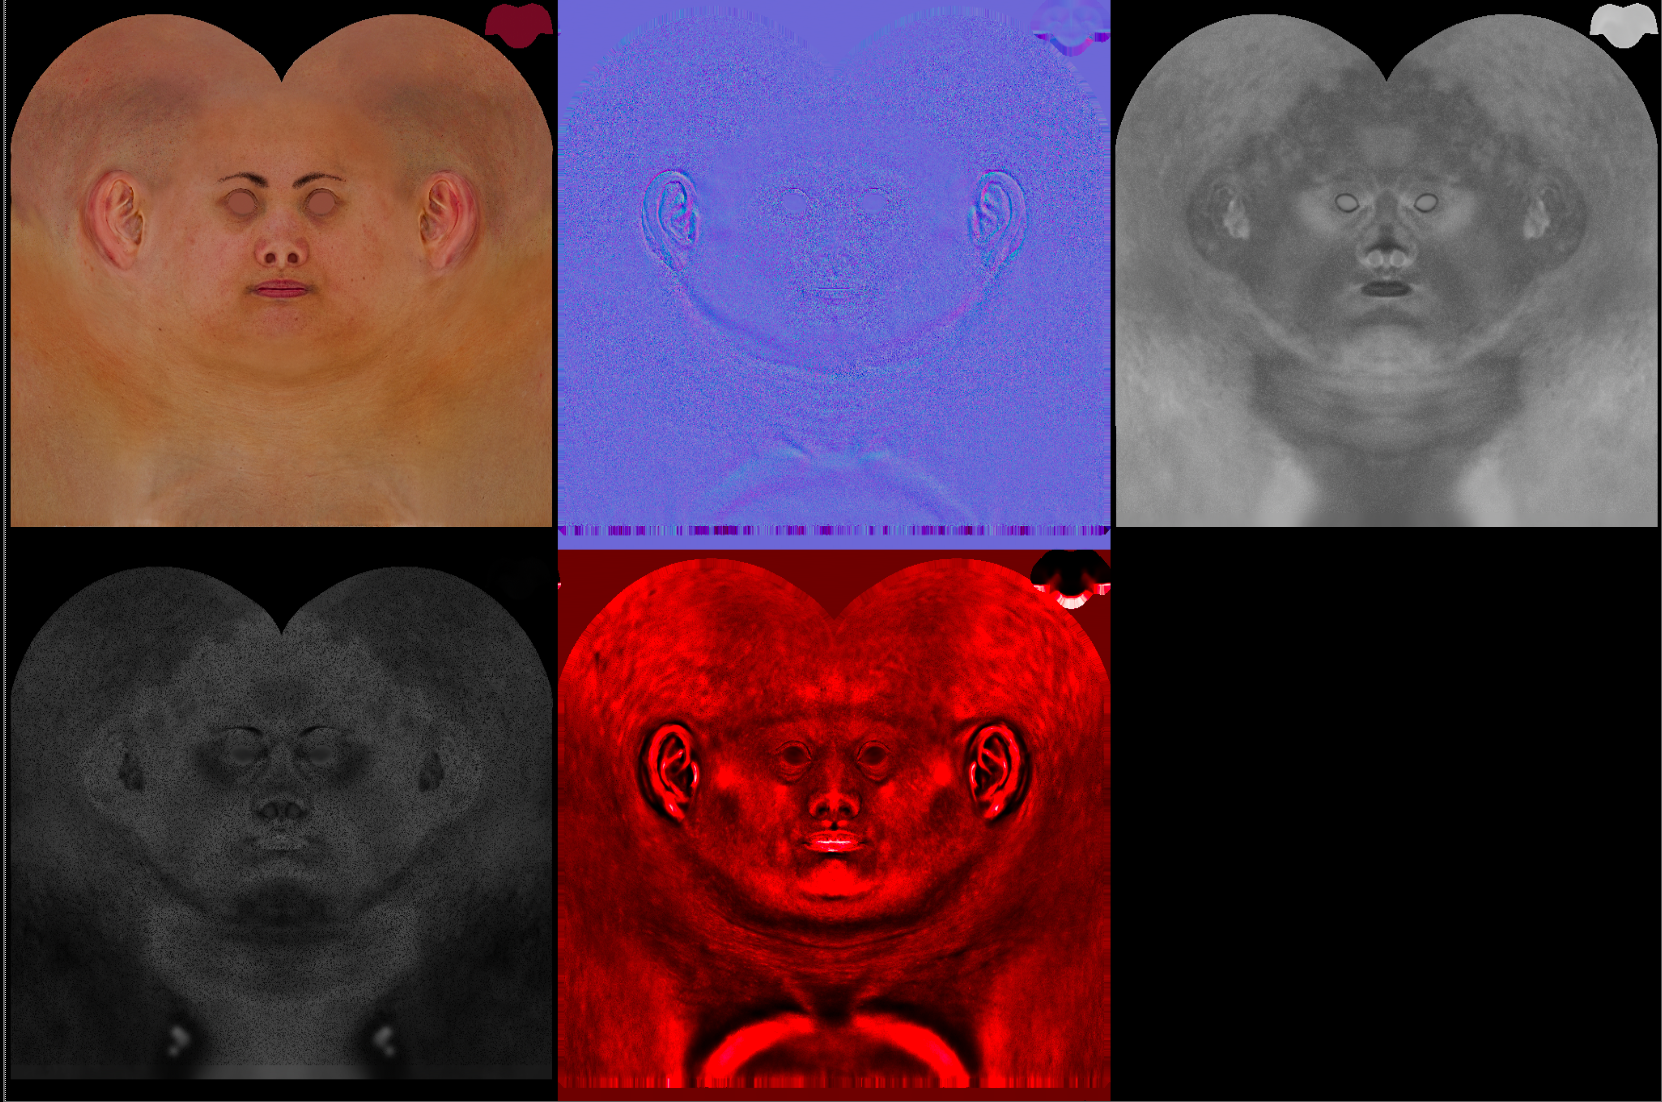
For this tutorial I'm going to be using only the textures in the Textures/JPG/Face folder - there are also some additional textures for micro bump as well as several masks, but I want to show how far you can get with just a simple set of Diffuse, Displacement and Roughness maps. In my opinion, the magic in skin shading lies in tweaking how the shader treats those 3 maps. I'll leave you to explore the rest.
Displacement
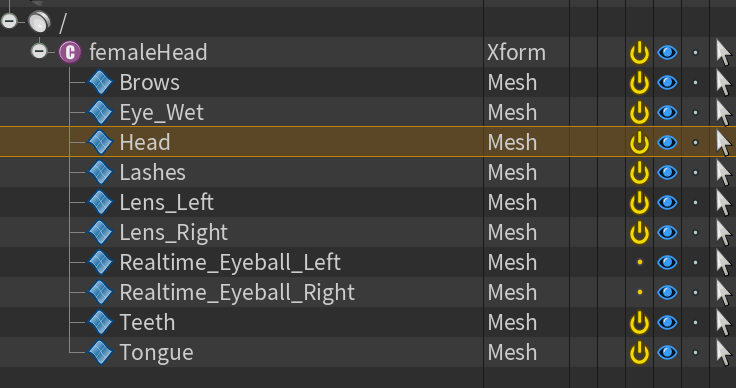
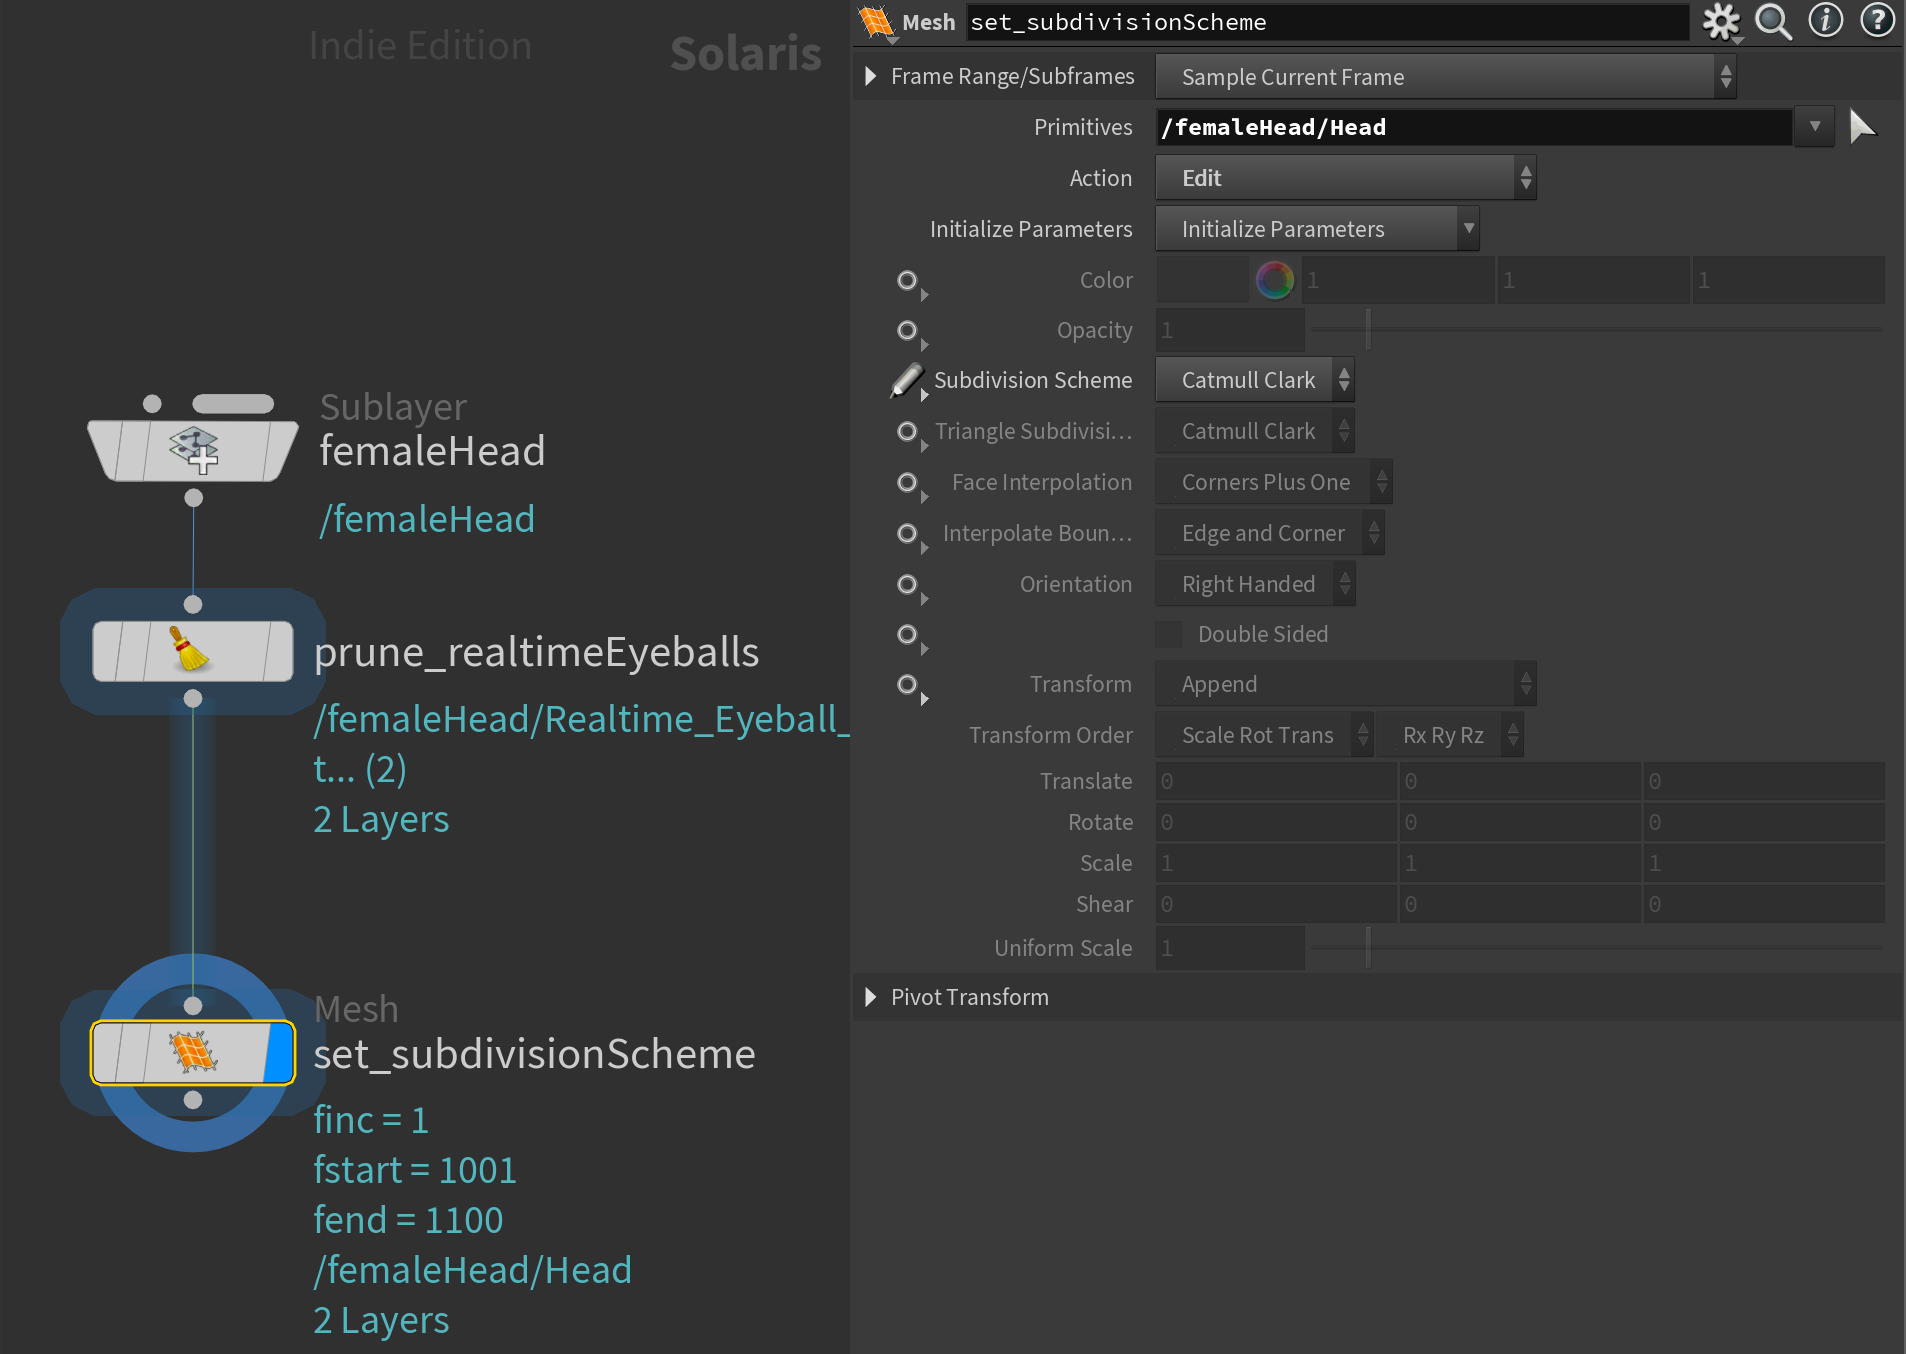
Let's start with displacement. Similar to our introduction paragraph we need to specify a Subdivision Scheme on our head mesh using a Mesh LOP. Remember to target specifically the mesh primitive - not the top group.
Following this we need to set up our Dicing Quality option to make sure we get a proper displacement and subdivision. To do this you add a Render Geometry Settings LOP targeting the same mesh primitive (the head in our case), and adjusting the Dicing. I've set it quite high, to a value of 2, to get some crisp displacement.
With that done, drop down a Material Library LOP, dive inside, and create a Karma Material Builder named skin_shd or whatever you prefer. Inside this, we'll find our usual standard MaterialX and Karma nodes.
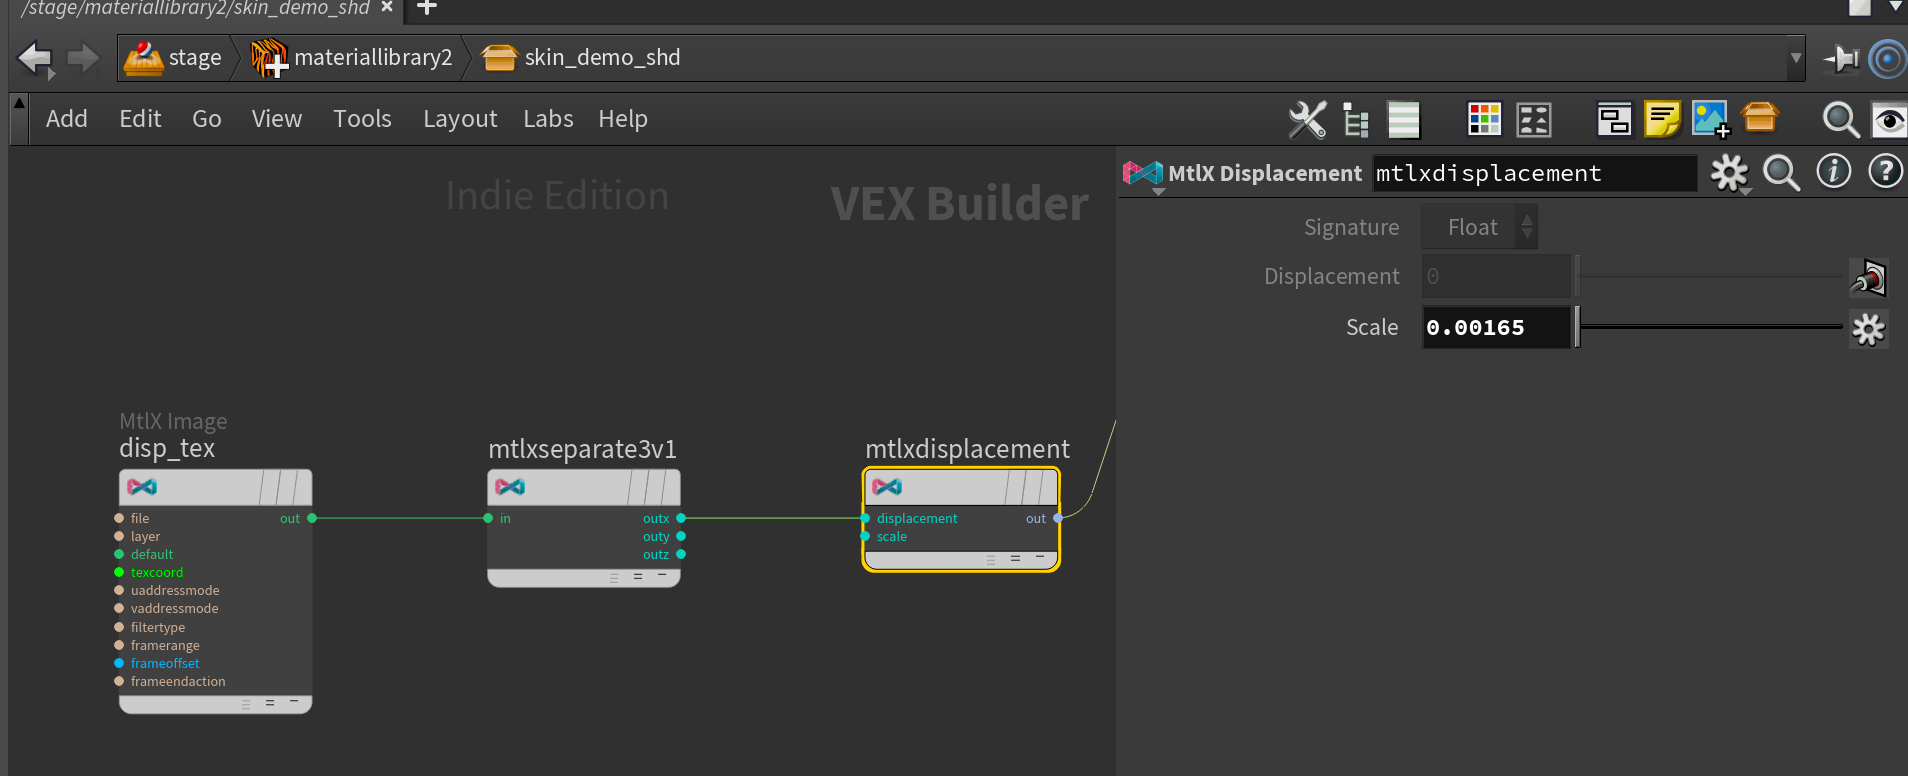
Now we'll add our displacement map. To do this we'll need a MtlX Image node - this is the standard node for loading textures in MaterialX. Load the displacement map from Textures/JPG/Displacement/ into the Filename parameter.
After that node, you'll need to chain a MtlX Separate Vector 3 node. We need this because the displacement texture only uses the red channel (see the texture contact sheet earlier in the article) - this way we convert that channel to a float and effectively treat the texture like a greyscale image.
Finally, we plug this into our MtlX Displacement node and set the Scale to something appropriate for our scene scale. This will vary a lot from asset to asset. For this asset I found 0.00165 to work quite well.
Specularity and Roughness
Before we dive into Subsurface Scattering, let's quickly look at adjusting our specularity. This is also a very important aspect of skin shading, and often is very dependent on the displacement, hence why I adjusted that first.
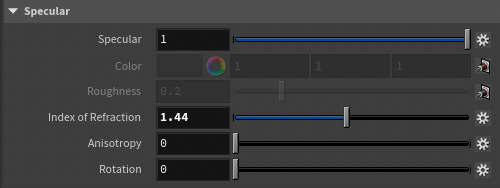
When configuring specularity and specular roughness I like to set the diffuse/base color to a neutral grey value of 0.18 . This creates a nice neutral base for me to see how the lighting interacts with the specular components of the shader.
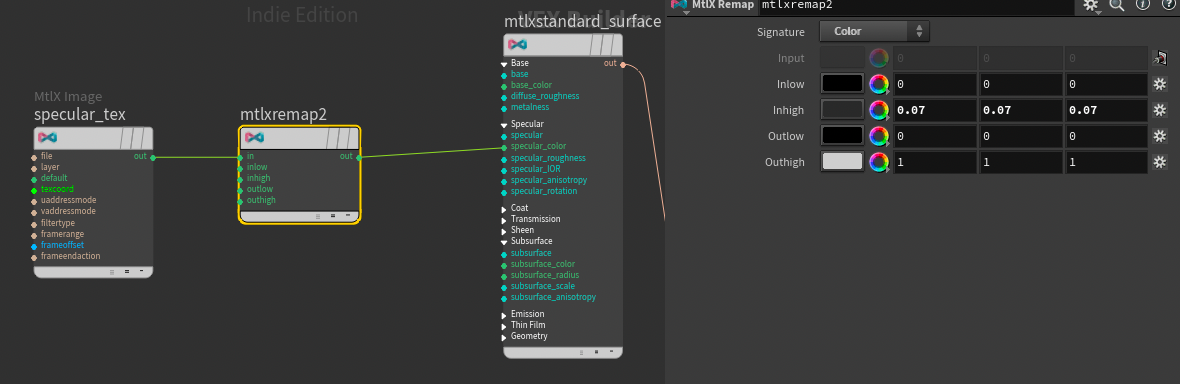
After doing that I enabled the Specularity by setting it to 1 and loaded in the Textures/JPG/Face/Face_Specular.jpg texture using a MtlX Image node. I plugged that into the Specular Color and remapped it using a MtlX Remap because it was very dark. I set the Inhigh to be of a much lower value, squeezing the values so the range of 0-0.07 is now 0-1, creating a much brighter map.
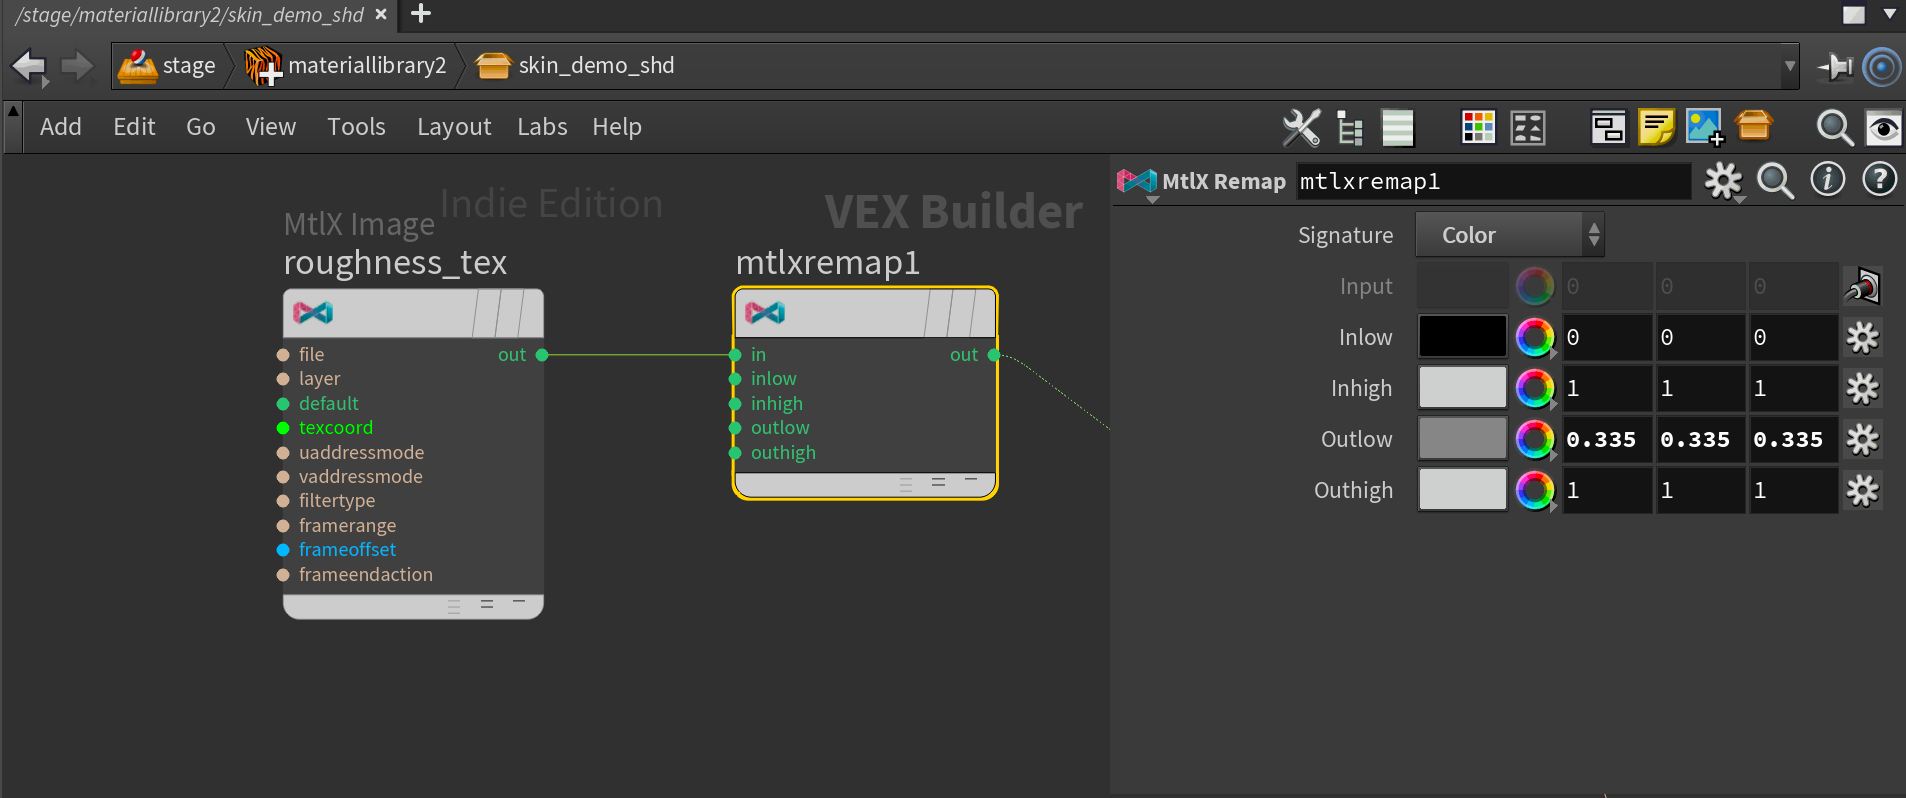
Then I loaded the Textures/JPG/Face/Face_Roughness.jpg texture using another MtlX Image and then remapped it using a MtlX Remap. I did this because I wasn't quite happy with the default roughness map as I found that it wasn't rough enough for my taste, so I lifted the lower values.
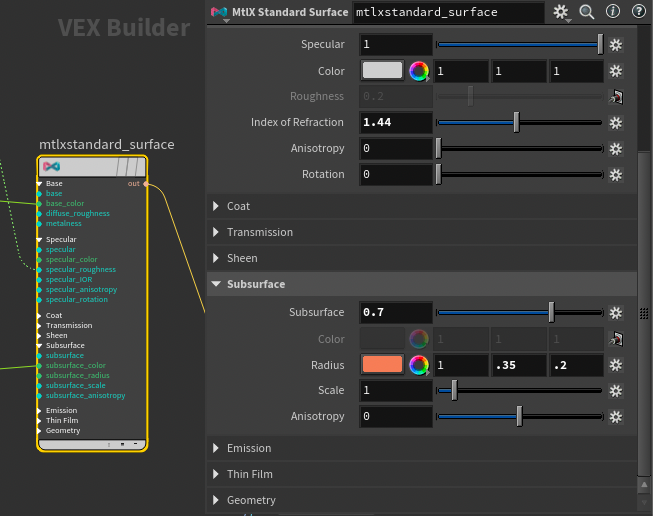
I also set the IOR to 1.44 as this tends to be a good starting point for skin.
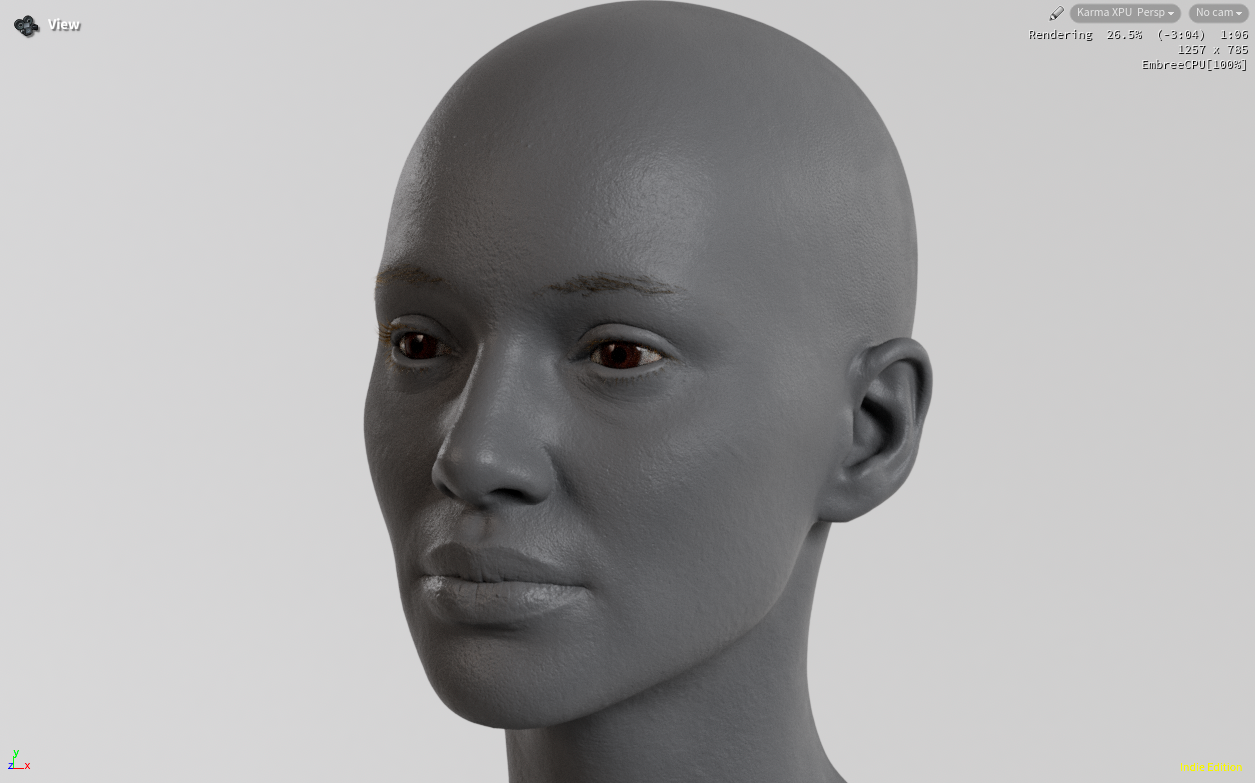
This gives us the result below.
Subsurface Scattering
Now let's dive into the meat of the shader with Subsurface Scattering. As with most shading this is a creative process and finding the right balance will vary from asset to asset. I'll try and provide you with a good starting point and let you explore from there. Don't be afraid to experiment with some crazy values, it's really important to break things if you want a deeper understanding of what you're working with.
We'll start with the Subsurface parameter. As mentioned earlier this controls the amount of subsurface scattering in your shader. Normally you would want to set this to 1.0, but in my case, I decided to dial it down to 0.7. This allowed me to blend a little bit of diffuse shading in, making my skin feel a little more opaque.
I then plugged the diffuse texture into my Subsurface Color parameter as well as my Base Color parameter (at the top of the shader) to take advantage of the nice skin texture we got with this asset.
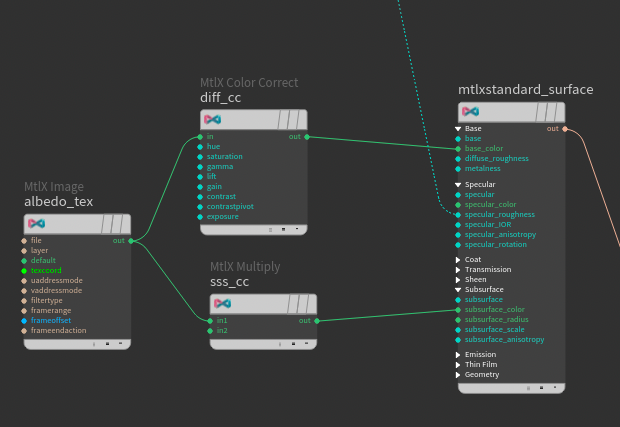
The Subsurface Color I multiplied with the value [1, 0.975, 0.975] using a MtlX Multiply to make it slightly more red. This helps boost the appearance of the redness caused by the interior of the body being illuminated by the light.

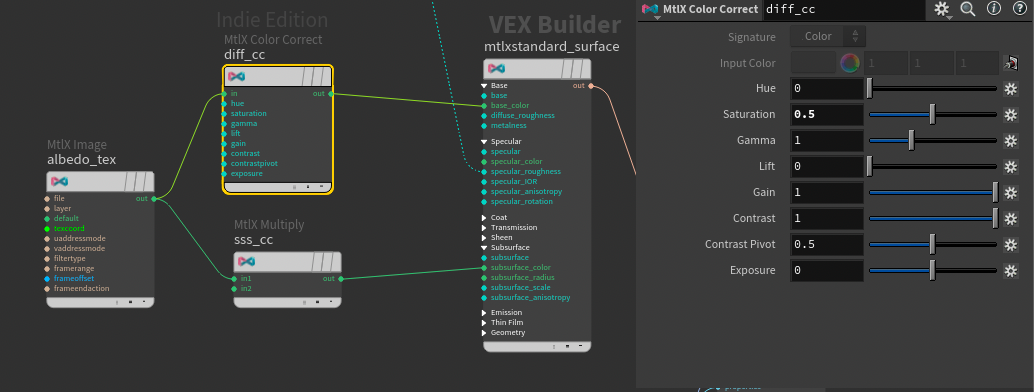
For the Base Color, I also graded it a bit to compensate for the boosted redness in the Subsurface Color. Here I did a simple desaturation using a MtlX Color Correct with Saturation set to 0.5. This might be considered a bit too much desaturation to some, but I found that it gave her a very nice naturalistic look when combined with the rest of the shading.
In other types of shaders, you might have stumbled across a three-layer workflow where you had a Deep, Mid, and Shallow layer of Subsurface Scattering (in AlSurface for example). This was very important to get the proper skin look. To simulate this in shaders with access to only one layer of Subsurface Scattering, like MtlX Standard Surface, you can instead set the Red, Green, and Blue channels of the radius to separate values to get more complex scattering effects.
For skin, I recommend using [1.0, 0.35, 0.2]. This is a value I shamelessly stole from the Arnold Documentation, but it works very well.
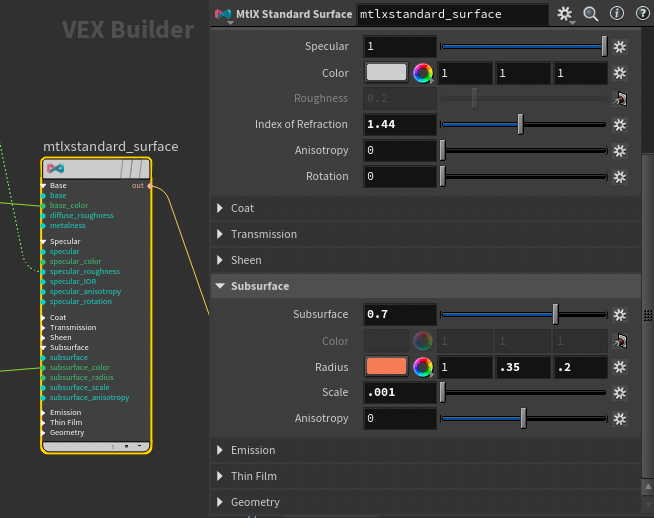
Lastly, you need to adjust the scale. For our Female Head model, I found the value 0.001 to work quite well. Once again this is very dependent on your scene scale.
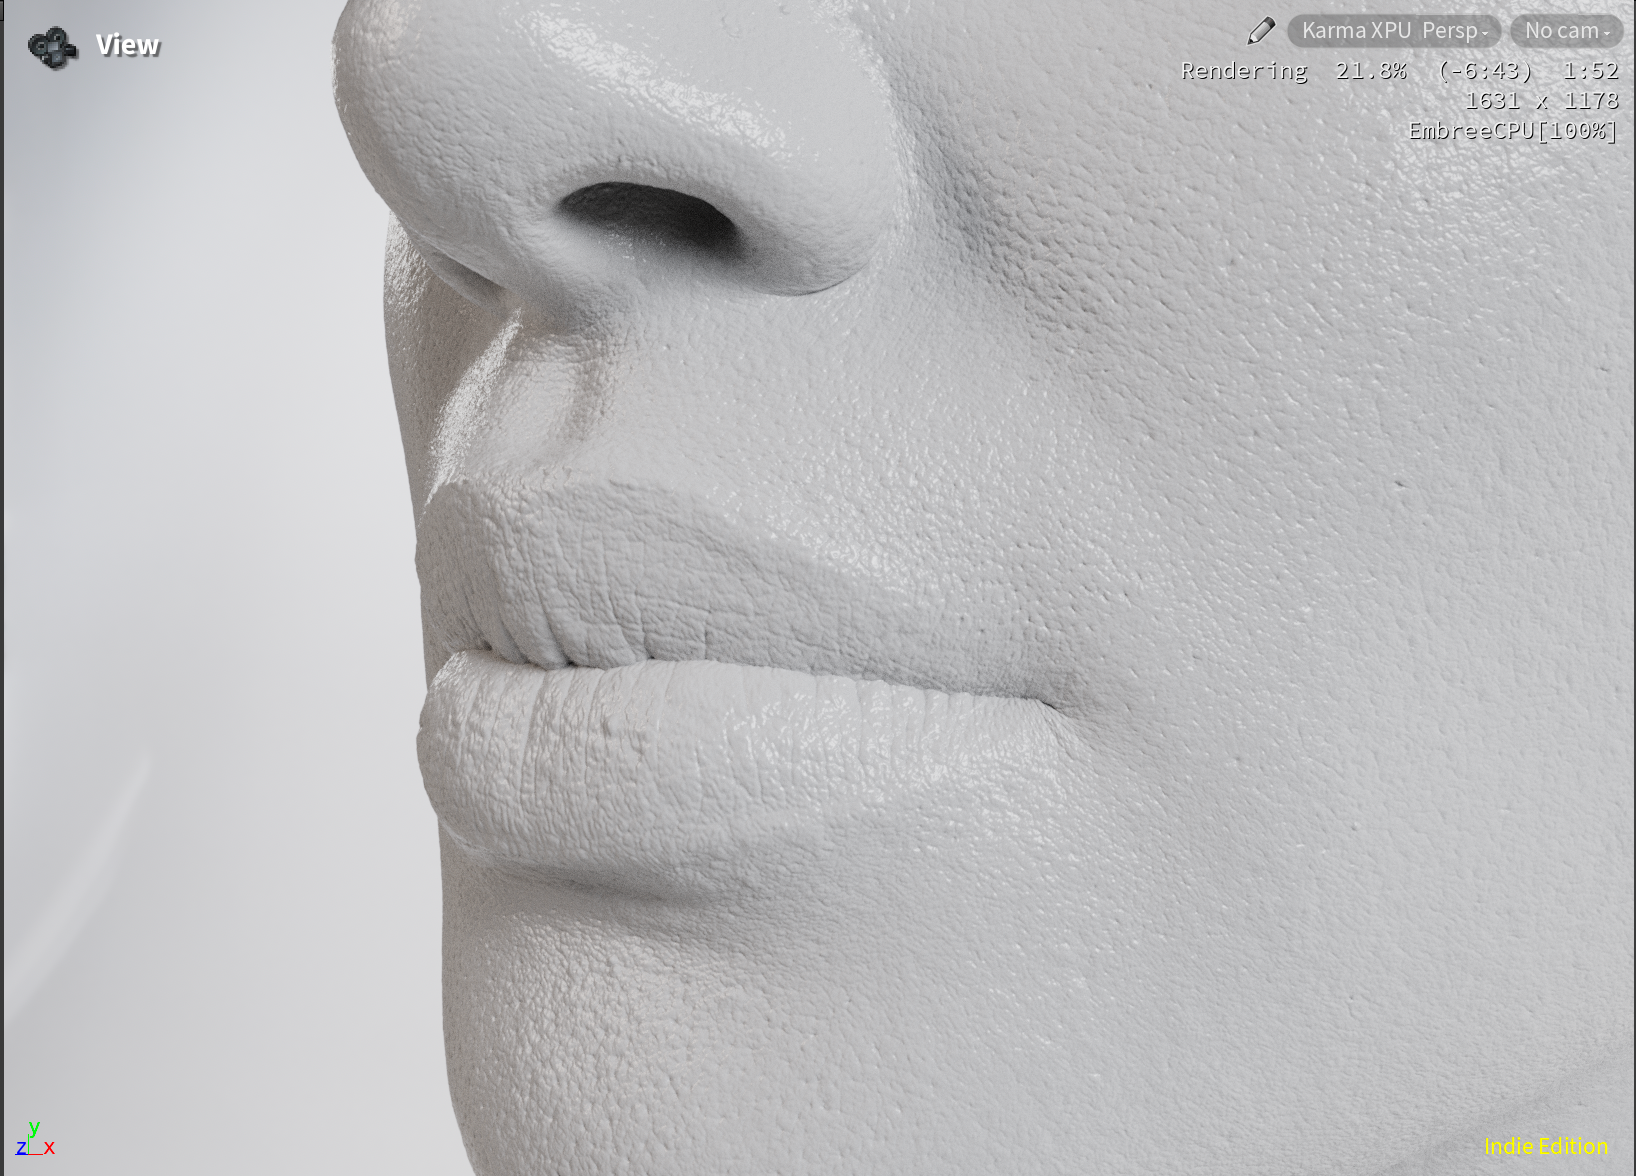
And with that, we have our final skin shader! As I mentioned earlier there are tons of other things you could play around with here, like adding an extra layer of micro-bump for smaller skin pores. But I think this shader provides a great starting point for your own experimentations and holds up very well even at close-ups.
Final Turntable featuring Skin Shader.
Conclusion
And there we have it, a basic skin shader in Karma. This was a little shorter than my last couple of articles, but I hope you enjoyed it. I didn't find many resources on how to approach proper skin shading in Karma with MaterialX, so I felt I would try to provide that documentation to artists new to the render engine.
As always, let me know if you have any questions in the comments below or if there is something you'd like me to cover. See you next time!
I have even more content planned for the future, so if you're interested feel free to subscribe to my newsletter below and get all my posts straight to your inbox.